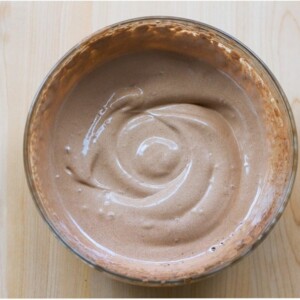
Chocolate Marshmallow Fluff – like eating a chocolate marshmallow cloud with a spoon!


Fluffy, soft, airy, sweet, rich, & extra chocolatey…
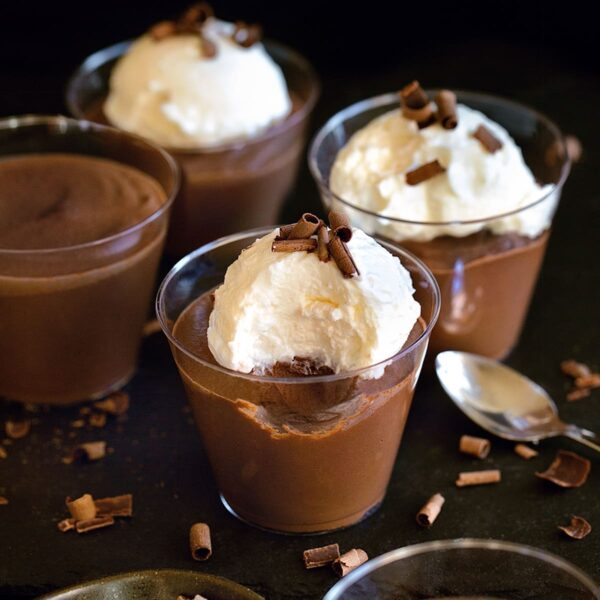
It’s almost like a lighter version of whipped chocolate mousse.
This homemade chocolate marshmallow fluff recipe–which has NO corn syrup and can even be sugar-free–is based on my Vegan Marshmallow Fluff recipe and makes a fantastic frosting or whipped topping.
And it’s equally delicious if you want to eat it plain with a spoon.
After I took the pictures, I whipped it up a little longer, and it became even thicker and fluffier, with stiff chocolate marshmallow peaks!

Unlike many traditional marshmallow fluff recipes, there are no raw eggs here, meaning it is allergy-friendly, suitable for vegans, and it can be eaten raw.
You can also bake it into vegan chocolate meringues!
Feel free to change up the flavor by adding a little cinnamon, chili powder, or even some instant coffee once the chocolate marshmallow fluff is already whipped.

The ingredients might sound a little (okay, a lot) crazy.
And it often doesn’t get thick at all for the first few minutes or whipping… but then magically it transforms before your eyes into thick chocolate marshmallow fluff!

Chocolate Marshmallow Fluff
Ingredients
- 1 15 oz can no-salt chickpeas, chilled in the fridge
- optional pinch cream of tartar, for stabilization
- 1/3 cup agave or honey, OR 1/2 cup fine sugar or xylitol
- 1/4 tsp pure vanilla extract
- 2 tbsp cocoa powder
- 1/16 tsp salt – important
Instructions
- *Edit: While most readers are reporting great results with the recipe, a few have said their fluff deflating after adding the cocoa. I've made the recipe three times and haven't encountered an issue, so I'm not sure what could have happened for them, but hopefully those few cases were just a fluke. Sometimes the mysterious science of baking can be frustrating!Open the can of beans. Drain only the watery part into either a stand mixer or large mixing bowl. You should get around 1/2 cup liquid. (Save the actual beans for another recipe. Need inspiration? Here are 50+ Recipes With Beans.) Add all ingredients except the cocoa and salt to the mixer or bowl. Beat with an electric mixer or in a stand mixer for 12-16 minutes. It'll probably look very thin for at least the first 9 minutes – Mine began to thicken around minutes 10-11, then it just kept getting thicker! Once thick, beat in the cocoa and salt for another minute. Leftovers can be covered and refrigerated. It separates overnight, but re-beating works well. (I don’t advise trying the recipe in a blender or without beaters, and black beans will work but yield a much thinner result.)View Nutrition Facts
Notes


Trending Right Now:


Sorry if this is tmi, but when I don’t fully rinse beans from the can I get crazy insane gas. The idea of using the actual liquid from the can terrifies me. Am I the only one with this issue?? Maybe it has to do with what is actually in the can? I’m not sure…. It’s frustrating.
The best way to eat beans is to soak them first for 24 hours, exchange that water a few times and then cook them. Only then you can use the cooking water and you should have less trouble with gas. And yay for aquafaba! The first thing I made with it was chocolate fluff to reminisce my chocolate mousse days. 😀
Hi, my mom had the same problem. Yet, I’m not sure her solution will work with this. Baking soda.
Unless this could sub for the salt ( I doubt it ) it’s a no go. Have you tried mint & ginger tea after a meal? Sorry you have this problem: I know my mom suffered intestine pain too. It’s definitely not a joke.
Try taking a Beano tablet first. It really works.
I definitely need to watch my portions of both beans and bean-liquid. If you can’t tolerate unrinsed beans, then definitely don’t eat these desserts. I know I’m going to struggle tonight, because we whipped up some hummus for lunch, and then used the leftover bean water for brownies and this fluff. But all 4 of us are eating it, and we are in qurantine, so we will all suffer together and not subject any outsiders to our.. ahem… musical fruit concert :-D.
Oh my god this looks so good! I can’t believe you make it with chickpeas. Definitely need to try this.
http://www.sprinklesandsaturdays.com
I may have just gotten a little over excited, haha. I read chocolate and fluff then healthy. Yeah, I squeaked! I’ve pinned this for later.
Woah. Katie.
This is gold.
Pure, chocolate-ie, liquid, gold.
You are amazing.
I love that you made a marshmallow fluff out of aquafaba!! So genius!! 😀
WOW! Looks amazing!
Izzy | https://plantbasedizzy.wordpress.com/
Have you experimented at all with other uses of chickpea liquid (or Aquafaba as its becoming known as)? I made a decent mug cake, I probably needed more liquid in my protein wrap and it made a very good vegan Buffalo sauce but I’d love to see your takes on it.
OMG this is literally in my mixer right now and I cannot believe how delicious it is! Mine fluffed up even quicker than the recipe says (I had the mixer on high). I’m not telling my man what it’s made of until he tries it. He will never guess.
Holy mother of all that is good in life! LOL This is chocolate gold! Cant wait to try this recipe! I dont have a stand mixer but would a hand mixer do?
Probably not, but try it and let us know how it works.
I’ve made the plain fluff with a handmixer, just requires a bit more arm work 😛
Oh, this would be the perfect match for fresh fruit or as a light mousse.
I know many people have had trouble with cocoa powder/chocolate whilst making aquafaba meringues and marshmallow fluff in the past, so I was surprised to find that you used it here. Have you tried making meringues with this recipe?
I have tried over and over to make my aquafaba fluff chocolate…how on earth do you keep it from deflating? Even when I use xanthan gum, it deflates as soon as I so much as sprinkle cocoa powder on something *nearby*.
Is there a reason you use no salt beans, then add salt? It seems like using regular beans would be cheaper and simpler.
I was wondering the same thing. I looked at 2 different grocery stores and could not find a can of chickpeas that didn’t have salt. I was hoping to make this for a birthday cake, and don’t have time to run out of town to Trader Joe’s or Whole Foods to look for unsalted. I’m wondering if using unsalted allows it to be able to take a bit of weight from the other added ingredients?
I used salted and it turned out great.
The aquafaba whipped up in 4 min, using my kitchen aide mixer on high speed. The moment I mixed in the salt and cocoa, it deflated.
The cocoa I used was processed with alkali. Could that be the problem?
I tried it with first with alcali ( dutched chocolate) and it failed, then with raw untreated cocoa powder and it held up.
I used raw cacao and it deflated some, but it’s really creamy still. Just a bit less fluffy. It’s yummy. I may have used a bit too much, though. I like it really chocolatey!
First of all: I love your recipes! Especially that ther is a chocolateversion of almost everything *-*
But this recipe did not work out as I tried it 🙁 I used a hand mixer and the fluff looked good until I added cocoa, then it was just thin liquid anymore and had nothing to do with fluff, quite a pity! Maybe I will try again but I do not know what I did wrong 🙁
Followed exactly, it whipped up perfect, then as soon as I added in the cocoa and salt it turned to liquid. 🙁
Hmm, that’s strange. I didn’t have any problems with this recipe. Maybe it’s a climate-related problem?
If you don’t have beaters, it also works in a food processor.
This did not work for me. Like other people have mentioned, as soon as I added the cocoa, all the fluffiness went away and it turned to chocolate soup. I wonder if you mean 2 teaspoons of cocoa instead of 2 tablespoons? Mine was super dark, way darker than your pictures.
Did you use dark cocoa? I used two tablespoons regular cocoa and it was pretty much the same color as Katie’s but actually thicker and fluffier than hers even.
I was hesitant because I saw another commenter say this didn’t work for her but I was too curious to not try it anyway. And it totally worked for me!
I had thick chocolatey marshmallow fluff in a matter of minutes, much quicker than it said it would take in the directions. I was eating it with a spoon and a huge smile on my face that something so weird is actually so good.
Who knew?!